A set-back is the area around the panels where fire fighters and other service personnel can get around the solar arrays that are installed on our roofs. In many areas, these no-build zones have traditionally been called “fire set-backs.”
Set-back defaults
The default widths are set by the fire and building codes in your area but for the most part, here are some common guidelines for our area.
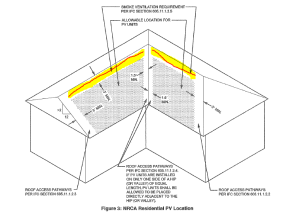
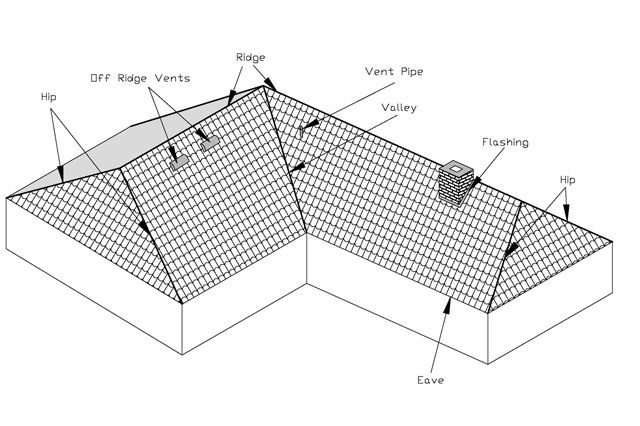
The Ridge, Valleys and Hips
The ridge is the top-most or peak line of the roof. Valleys are the dips (lows) between adjoining mounting planes and the hips are the ridge lines (highs) between two sloping mounting plans.
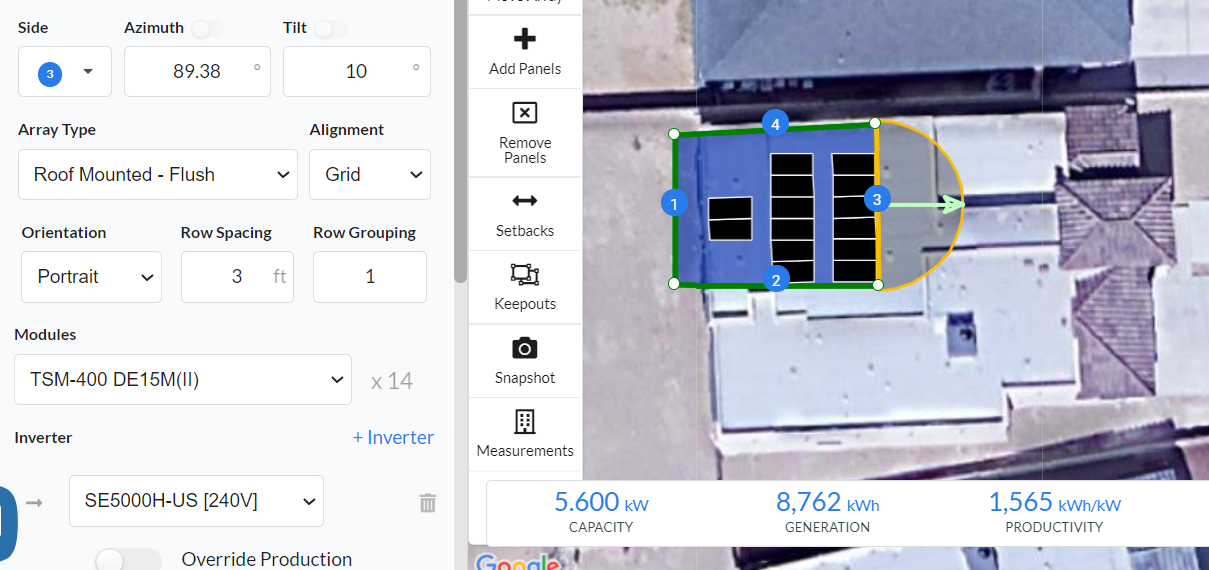
The set-backs for these areas are 1.5 feet or 18 inches. If solar panels are mounted on adjoining areas (as in ridges, hips and valleys), there will be a 3 feet margin between them, which gives fire workers enough room to move between the arrays.
Gabled Roofs
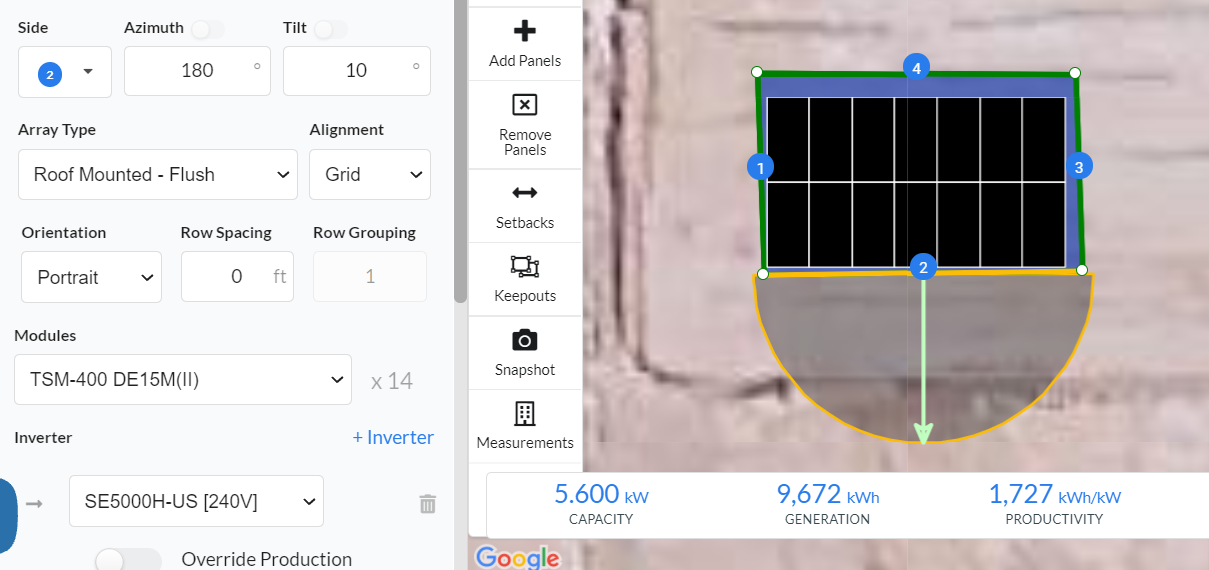
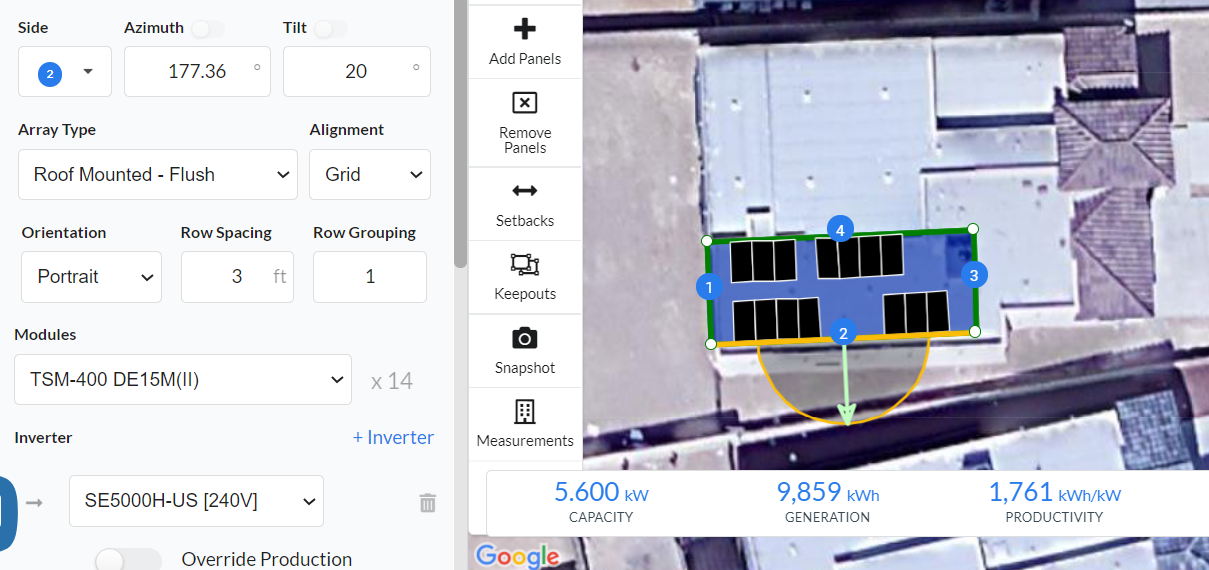
Gabled roofs have mounting planes that are perfect rectangles. These types of roofs have a 3 foot set-back at the outer edge in addition to the 18 inches on the ridge line.
Gutters and Eaves
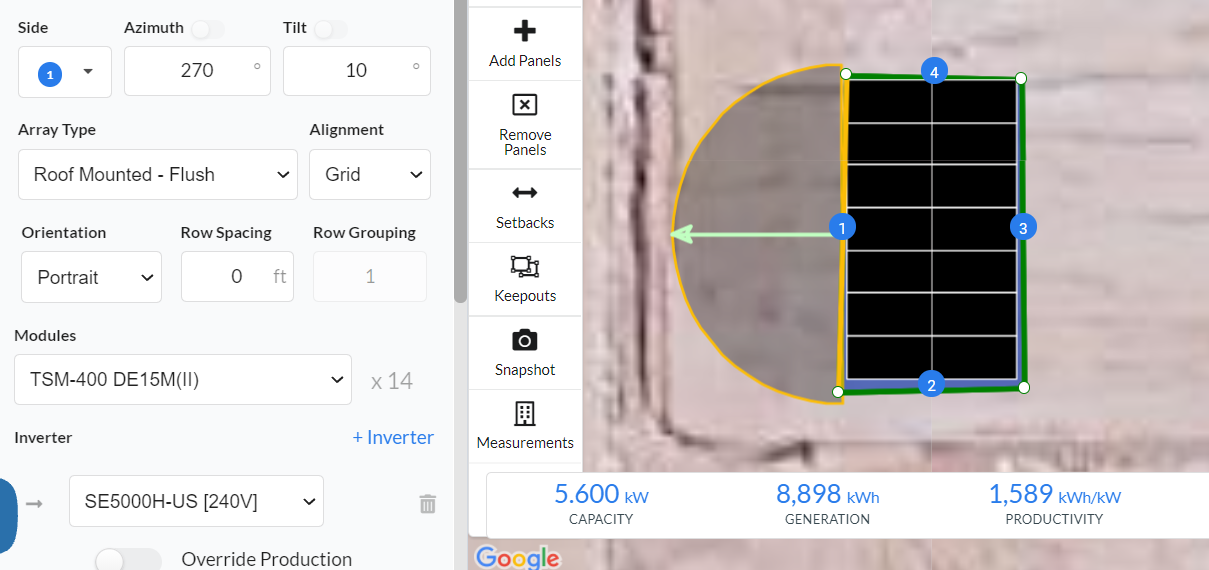
Whether you have a gabled or other type of pitched roof, the lower edge (known as an eave or gutter) has a 0 inch set-back. This means that solar arrays can be installed up to the lower edge of the roof.
Flat Roofs
These types of roofs are very common here in the borderland. They too have set-back requirements. The perimeter edges of most mounting planes on a flat roof have low walls called parapets. All parapet walls require a 3 foot fire set-back. This means that the solar arrays cannot be any closer than 3 feet from the inside edge of all parapet walls.
Designing your Solar System Using Set-backs
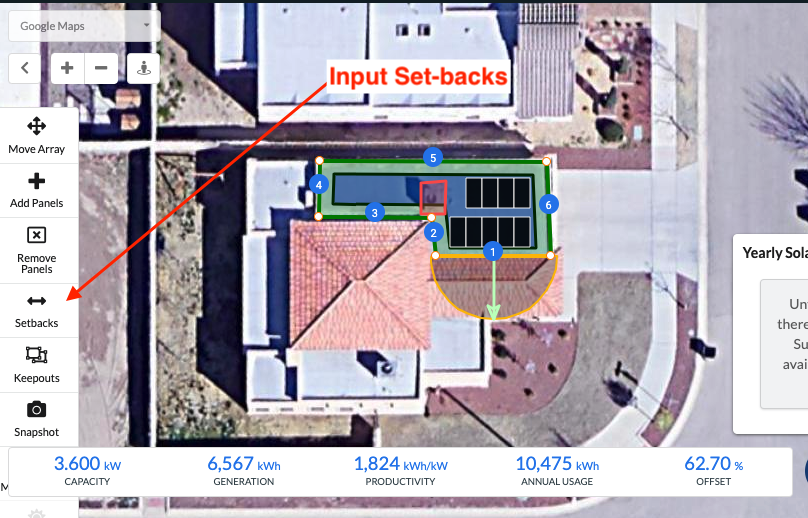
When setting up your set-backs for your designs, you want to lay out your panels and complete your initial design settings first. Once your initial layout is done (whether it is a pitched roof or a flat roof), you will then set up your set-backs.
Pitched Roofs
Select the Set-backs button on the left of your design.
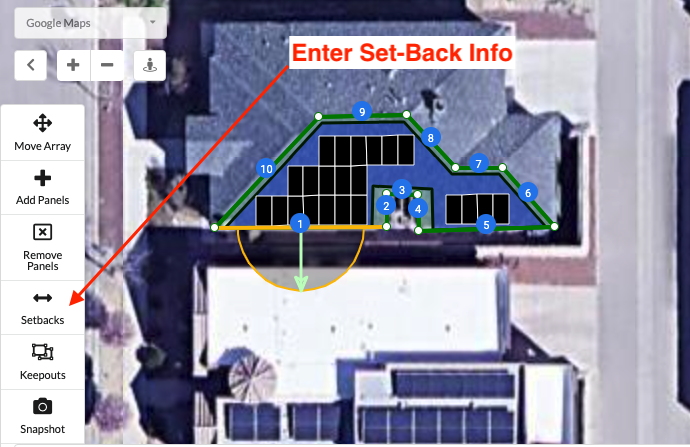
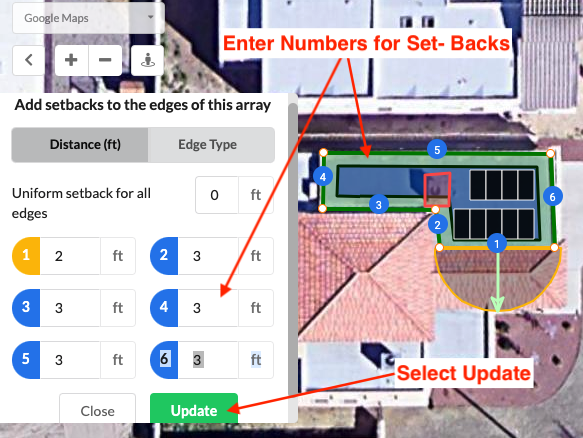
Enter the set-back values for each of the edges (in feet).
Gutters or Eaves (0)
Ridge (1.5)
Valleys and Hips (1.5)
Gable Roof Outter Edge or Straight Edges (3)
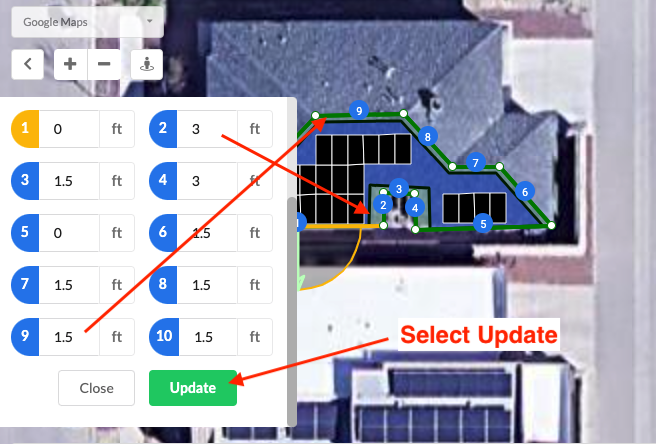
Select the Update, then Close buttons. Your design will update. At this point you can edit (add or remove panels) and do any fine-tuning you need to. Select the Calculate Button on the left and proceed to your Quote.
Flat Parapet Wall Roofs
Select the Set-backs button on the left of your design.
Enter the set-back values for each of the edges (in feet).
Set ALL Parapet Wall Edges (3)
Select the Update, then Close buttons. Your design will update. At this point you can edit (add or remove panels) and do any fine-tuning you need to. Select the Calculate Button on the left and proceed to your Quote.